Panduan Memilih Karpet: Jenis-Jenis dan Kegunaannya
ibcnu.us – Karpet tidak hanya berfungsi sebagai penambah estetika dalam sebuah ruangan, tetapi juga memberikan…
ibcnu.us – Karpet tidak hanya berfungsi sebagai penambah estetika dalam sebuah ruangan, tetapi juga memberikan…

ibcnu.us – Masjid adalah tempat ibadah yang suci bagi umat Muslim di seluruh dunia. Dalam arsitektur…

ibcnu.us – Karpet adalah salah satu elemen dekoratif penting dalam desain interior rumah yang dapat…

ibcnu.us – Karpet adalah salah satu elemen interior yang mampu memberikan sentuhan elegan dan kenyamanan…

ibcnu.us – Karpet tidak hanya berfungsi sebagai penambah estetika dalam sebuah ruangan, tetapi juga memberikan kenyamanan serta dapat menjadi bagian penting dalam merancang dekorasi ruang interior. Namun, memilih karpet yang tepat seringkali menjadi tugas yang membingungkan bagi banyak orang. Dengan begitu banyaknya jenis karpet yang tersedia di pasaran, serta berbagai faktor yang perlu dipertimbangkan, tidak…

ibcnu.us – Masjid adalah tempat ibadah yang suci bagi umat Muslim di seluruh dunia. Dalam arsitektur masjid yang megah, setiap detail dirancang dengan penuh kehati-hatian untuk menciptakan suasana yang damai, anggun, dan penuh kekhusyukan. Salah satu elemen yang sangat penting dalam menunjang kemegahan masjid adalah karpet. Karpet mesjid yang mewah tidak hanya menambah keindahan visual, tetapi…

ibcnu.us – Karpet adalah salah satu elemen dekoratif penting dalam desain interior rumah yang dapat memberikan sentuhan hangat, nyaman, dan gaya ke ruangan Anda. Namun, memilih karpet yang tepat bisa menjadi tugas yang menantang dengan begitu banyaknya pilihan yang tersedia. Dalam panduan ini, kami akan membahas segala hal yang perlu Anda ketahui tentang gaya, pola,…

ibcnu.us – Karpet adalah salah satu elemen interior yang mampu memberikan sentuhan elegan dan kenyamanan pada ruangan. Baik di ruang tamu, kamar tidur, atau area lainnya, pemilihan karpet yang tepat dapat mengubah suasana ruangan secara keseluruhan. Namun, ketika memilih karpet, ada dua kategori utama yang harus dipertimbangkan: karpet mewah dan karpet ekonomis. Berikut ini kita…

ibcnu.us Karpet olahraga merupakan salah satu aspek penting dalam membentuk lingkungan latihan yang nyaman dan aman di ruang Anda sendiri. Dengan beragam opsi yang tersedia di pasar, menemukan rug olahraga yang cocok dapat menjadi tantangan tersendiri. Namun, dengan mempertimbangkan beberapa faktor kunci, Anda dapat menemukan rug olahraga yang sesuai dengan kebutuhan dan preferensi Anda. Berikut…

ibcnu.us Karpet Berbahan memegang peranan krusial dalam menghiasi kamar tidur dan ruang tamu.Selain memberikan tampilan yang indah, karpet juga memberikan kenyamanan dan sentuhan hangat di ruangan tersebut. Dalam artikel ini, kami akan memberikan informasi yang lebih mendalam mengenai beberapa jenis karpet yang bagus untuk kamar tidur dan ruang tamu. Mari kita eksplorasi pilihan karpet yang…

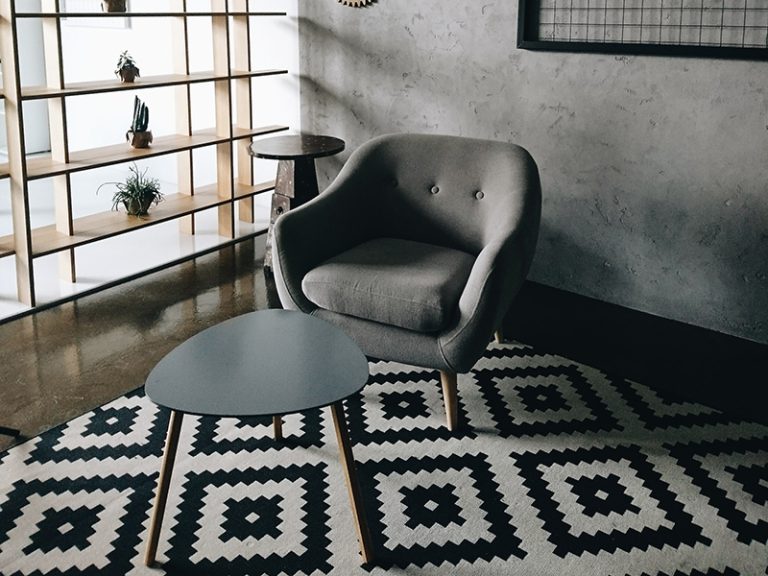
Karpet lantai warna hitam menawarkan tampilan menarik dan anggun. Namun, semuanya kembali pada dekorasi lain yang ada di ruangan. Dekorasi tersebut meliputi perabotan dan furniture. Penempatan karpet berwarna hitam hampir cocok untuk semua ruangan. Mulai ruang tamu, ruang keluarga, hingga kamar tidur. Bahkan tidak buruk menempatkannya di ruang perkantoran. Kelebihan Karpet Lantai Warna Hitam Bagi…

Jenis karpet kamar tidur banyak sekali yang mana setiap macamnya memberikan kelebihan tersendiri. Karpet adalah alas lantai simpel dan tidak membutuhkan banyak budget ketika membeli. Biasanya orang menggunakan karpet adalah kalangan rumah belum dikeramik atau untuk memperindah tampilan rumah. Penggunaan karpet sendiri mudah sekali, hanya dengan cara menggelarnya di atas lantai. Namun Anda selaku pengguna…

Bahan karpet yang mudah dibersihkan adalah jenis bahan karpet yang memiliki sifat tahan terhadap noda dan kotoran lainnya. Anda lebih mudah untuk membersihkannya dan menjaga penampilannya tetap baik. Sehingga ruangan Anda akan senantiasa tampak bersih dan tidak kusam. Menjadikan hunian terasa nyaman dan sehat untuk Anda tempati. Rekomendasi Bahan Karpet yang Mudah Dibersihkan Karpet adalah…

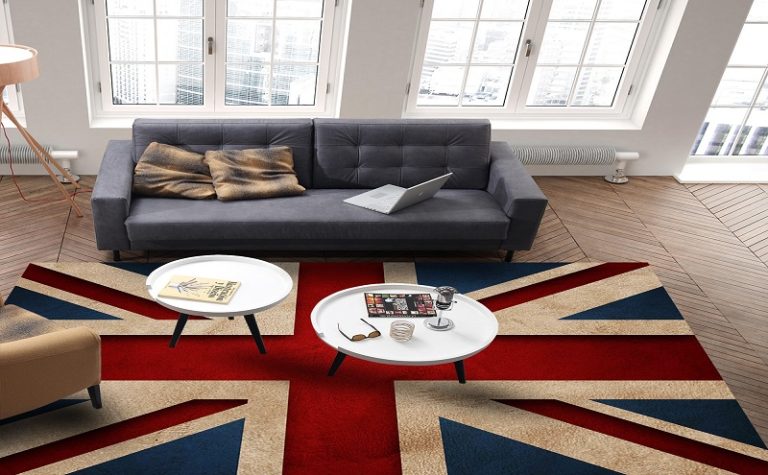
Karpet ruang tamu mewah yang tepat tidak hanya mampu memberikan kenyamanan saja. Siapapun yang menginjakkan kaki di atasnya akan tertarik pada keindahannya. Ya, ini karena karpet juga berfungsi sebagai aksen ruangan. Tampilan karpet pun bisa menjadi refleksi kepribadian pemilik hunian. Jadi, usahakan tepat memilihnya agar selera desain dari Anda tertuang sempurna. Inspirasi Karpet Ruang Tamu…